Table of Contents
This installation manual is tailored for anvi’o v1 branch. We strongly urge you to install anvi’o v2 instead.
There are multiple ways to install anvi’o.
This article explains basic steps of installing anvi’o using rather conventional methods. But before we start, you should also know about these alternatives:
- OS X installer for anvi’o (for Maverick and Yosemite).
- Docker image for anvi’o (for an instant, and painless installation of anvi’o on a server system).
- We also have a recipe for Ubuntu / Debian users.
- Finally, Canberk Koç & Çağrı Ulaş kindly prepared this recipe for Arch Linux users.
Regardless of whether you decided to go one of the alternative installation methods above, or you will continue with the more conventional method down below, you should take a look at these anvi’o requirements before going any further:
- Chrome Web Browser. Chrome should be not only installed, but unfortunately it also should be the default browser on your system (otherwise everytime interactive interface pops up, you will need to copy-paste the address to a Chrome window). Anvi’o does not support any other browser, and it will not perform optimally on others. You can test whether it is the default or not by pasting this to your terminal:
python -c 'import webbrowser as w; w.open_new("http://")'-
DB Browser for SQLite. Anvi’o uses SQLite to create self-contained databases to store information. There are many bindings for many programming languages to access to these database files and explore them, and it is also possible to use
sqlite3program from the terminal to play witht them. DB Browser for SQLite is a very easy-to-install open-source software that does whatsqlite3is doing with a nice graphical interface. I urge you to stick with the terminal as much as possible, but having a GUI option is always a nice thing. -
MyRAST. This is optional, and it is useful only if you are planning to do metagenomics with a focus on bacteria. In that case MyRAST can be quite useful, at least to get a broad idea about what is going on in your data. If you type
svr_assign_to_dna_using_figfamson your terminal and and do not get an error, you have it (pressCTRL+Cto quit). You need to know that your annotations with MyRAST will be OK for human gut, but you shouldn’t expect too much from it if you are working with other environments.
Please post a comment down below if you have any questions about installation. You may want to consider opening an issue for more technical problems.
Here I would like to thank Inés Martínez, Rika Anderson, and Sharon Grim for helping me a lot by volunteering themselves to test the installation.
An overview of anvi’o dependencies
You need to make sure your system does have all the following software if you are going to follow the installation instructions on this page. It is not as scary as it looks, you will be fine. Just follow the links for simple installation instructions:
Installation
You can either install a stable release of anvi’o, or you can get a copy of the latest snapshot from the repository (clearly, it is always safer to go with the stable release).
The following steps will collect some of the remaining software dependencies automatically for you. We heard that the installation of hcluster can cause minor issues. In which case you should separately install hcluster. Although we are planning to replace hcluster with a better and more up-to-date solution soon.
Installing the latest stable release (safe mode)
The best way to install stable release is to do it through pip. If you are have your dependencies sorted, try running this on your terminal:
sudo pip install anvioPleaes keep an eye on the output to make sure there are no errors.
If the installation finishes properly, run this in your terminal:
anvi-profile --versionIf everything looks alright, you are golden. Now you can run mini test if you would like to make sure everything else works as expected.
If you get a ‘command not found’ error despite a successful installation, this would mean that the directory where your anvi’o programs live is not listed in your PATH variable. Please follow this post to fix that first (and once you are done with it you can try running the mini test).
Installing or updating from the current codebase (semi-pro)
If this is your first time with the codebase, get a fresh copy (with all the submodules necessary):
git clone --recursive https://github.com/meren/anvio.gitThen go into the anvio directory, and then run the installation:
cd anvio
sudo python setup.py install
If you already have the codebase, and if your purpose is to update your already existing installation, you are going to need to run these commands from within the anvio directory instead of the ones above:
git pull
git submodule update --init --recursive
sudo python setup.py install
No errors? Perfect. Run the mini test!
Installation for developers (you’re a wizard, arry)
If you are planning to do this you need no introduction, but I will give you one anyway. Clone the codebase into a $DIR you like:
cd $DIR
git clone --recursive https://github.com/meren/anvio.git
Then edit your ~/.bashrc or ~/.bash_profile files depending on your system configuration to update your PATH and PYTHONPATH environment variables:
export PYTHONPATH=$PYTHONPATH:$DIR/anvio/
export PATH=$PATH:$DIR/anvio/bin:$DIR/anvio/sandbox
Of course this approach will not help you install all dependencies through pip. To avoid further headaches, I suggest running sudo pip install anvio once, so all necessary python modules are automatically installed, and then removing the anvio installation by running sudo pip uninstall anvio.
Finally, because you didn’t actually run the proper build, your C extensions will not be compiled. This is the fast way to get them compiled and put in the right place:
cd $DIR/anvio
python setup.py build
cp build/lib.*/anvio/*so anvio/
That’s it.
After sourcing your .bashrc (or .bash_profile) and get the new environment variables set, you should be able run the ‘mini test’.
Now you can edit the codebase, and test it, without re-installing anvi’o over and over again.
Running the “Mini Test”
What we call mini_test is a tiny shell script that runs a pretty modest anvi’o workflow on a small mock dataset to make sure things are working properly (we also have another shell script that runs almost everything implemented in anvi’o on the same dataset, in case you would like to take a look).
If you have a proper installation, you shouldn’t get any errors when you run the mini_test
If you installed anvi’o via pip (following the safe mode), you can go to an empty directory, and type these (don’t forget to replace the version number (which is 1.2.3 in this example) with whatever version you have installed. If you are not sure, type anvi-profile -v):
git clone https://github.com/meren/anvio.git
cd anvio/
git checkout tags/v1.2.3
cd tests/
./run_mini_test.sh
If you installed anvi’o from the codebase, you can go to the anvi’o source code directory, and simply type these:
cd tests
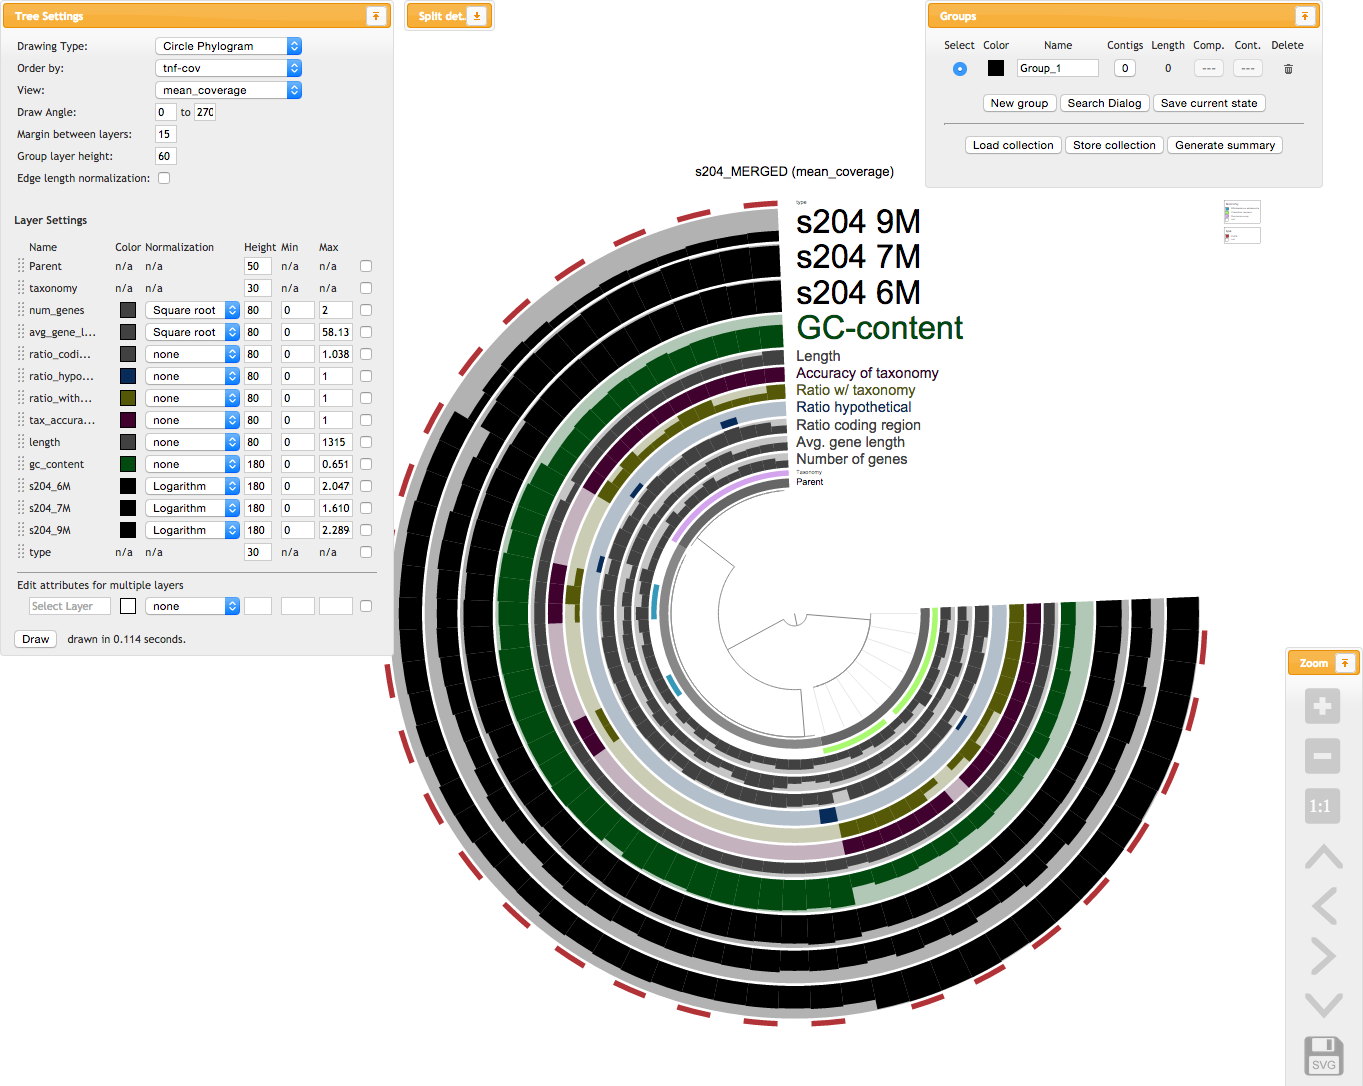
./run_mini_test.shUpon the successful completion of the mini test run, your browser should popup to take you to the interactive interface. When you click that ‘Draw’ button, you should see something like this (this is the old version of the anvi’o interface, and it shall stay here so we remember where we came from):
All fine? Perfect! Now you have a running installation of anvi’o!
Maybe you would like to continue with the other posts on the platform?